The Setup page guides you through creating a brand theme before you build your first course. The theme you save becomes your workspace default and applies to every course you create. You can edit it at any time later.

CreateUpon opens the Setup page automatically the first time you visit your library if:
• your workspace has no courses yet
• your workspace has no themes yet
• your plan supports brand themes
If you skip the setup, you can return at any time. From the library, select Set up your brand theme at the top of the page.
CreateUpon can extract a starting theme from any public website.
1. In the domain field, enter your company domain (for example, yourcompany.com).
2. Select Import from website.
CreateUpon reads the page and pulls out the dominant colors, two main fonts, and the primary logo. A live course preview appears with the imported theme applied. The button shows Importing... while the import runs.
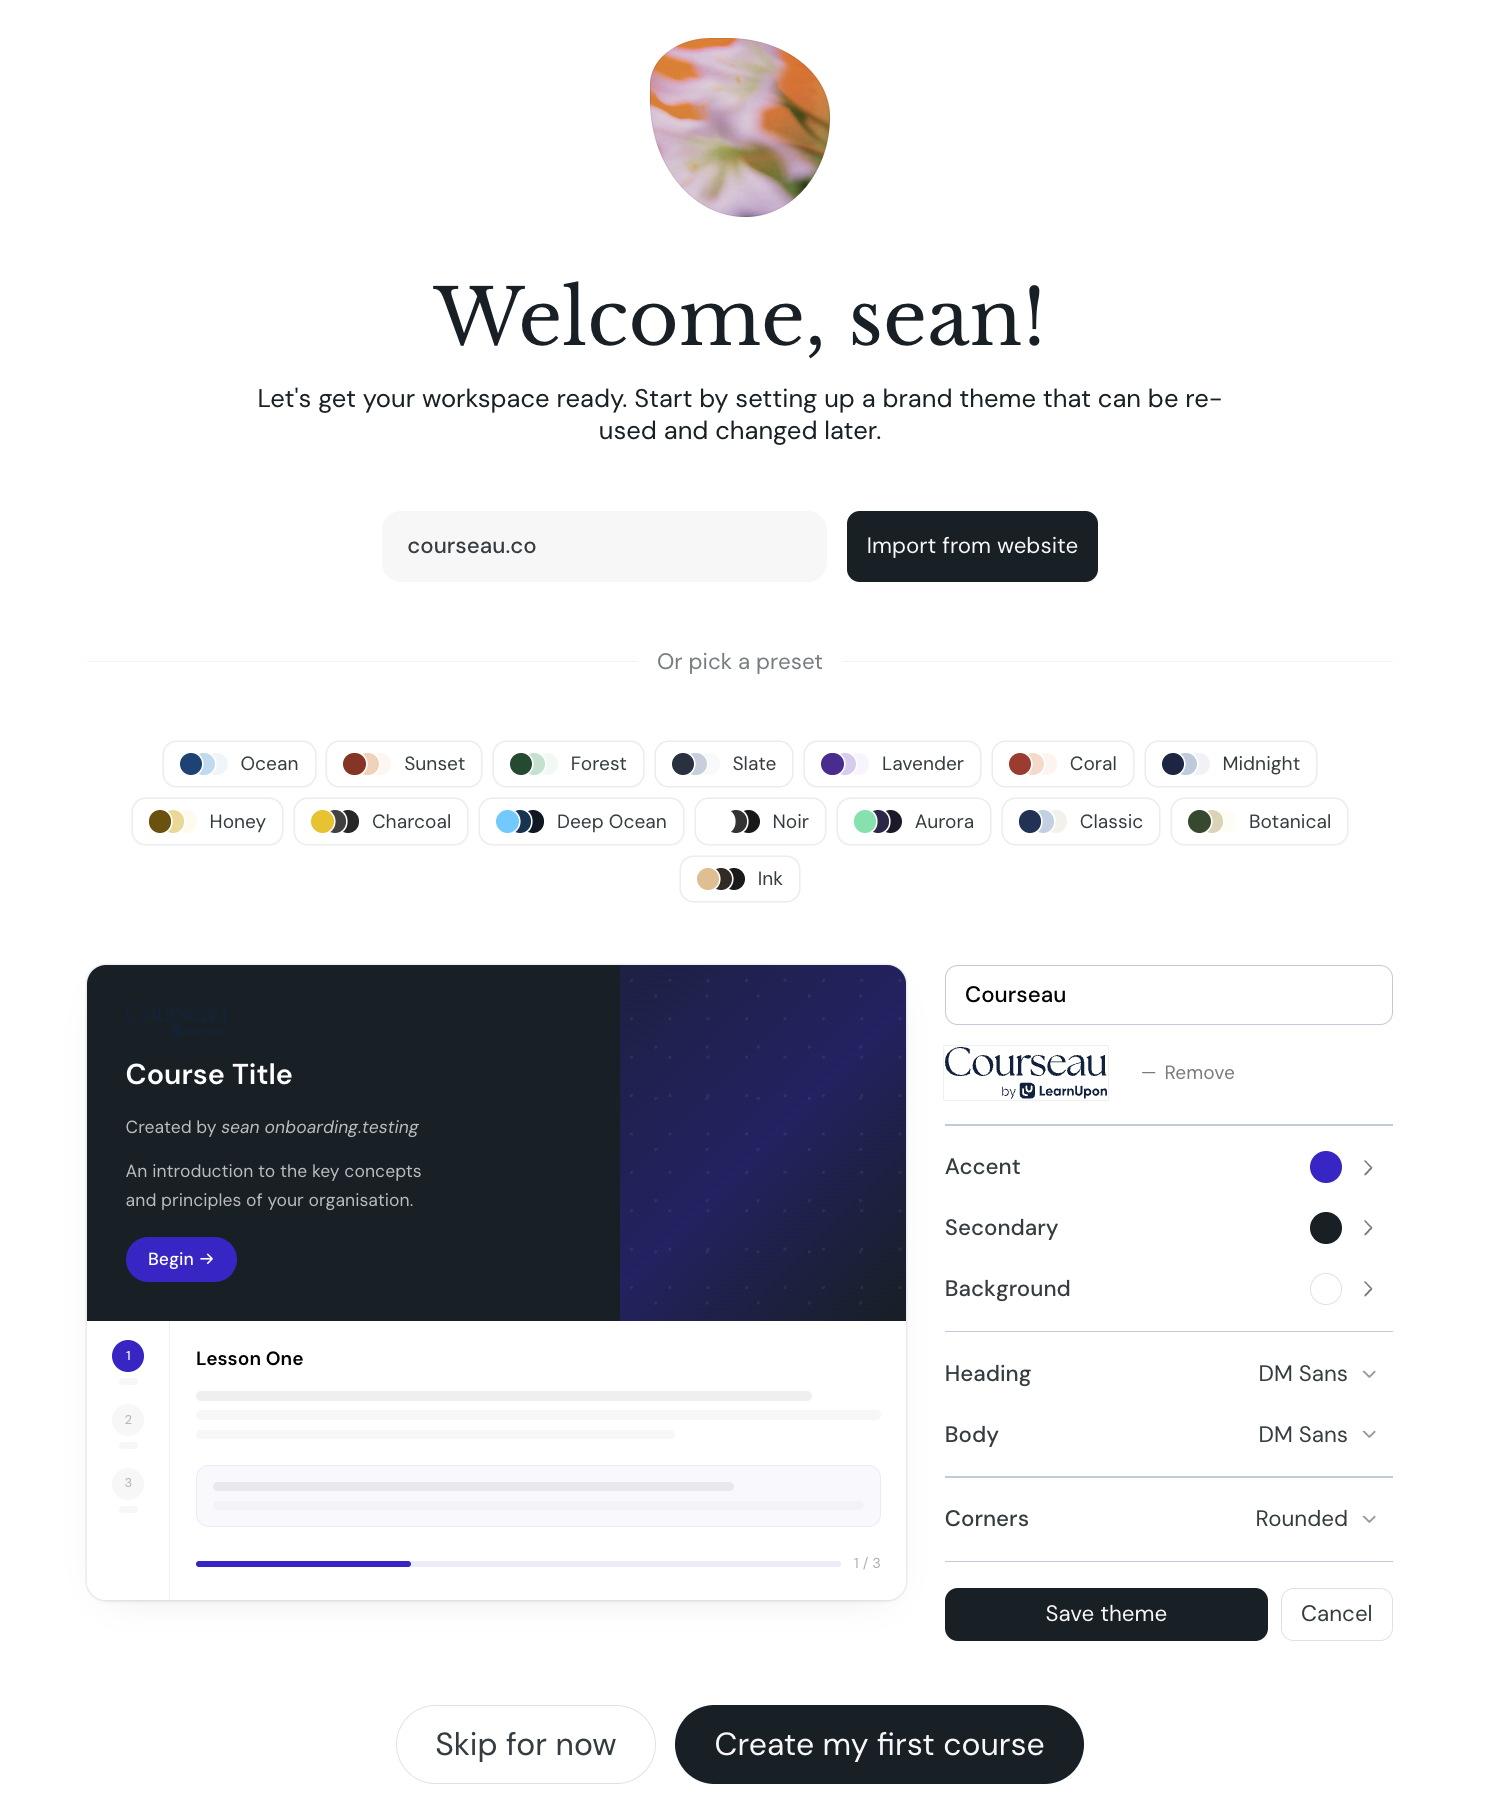
If you would rather start from a curated theme, scroll past the import field to the preset row.
1. Select any preset chip to apply it.
2. Adjust the colors, fonts, or corners as needed.
3. Save the theme when the preview matches what you want.
Once a theme is on screen, the panel to the right of the preview lets you edit each setting.
The preview updates in real time as you change each setting.
1. From the theme panel, select Save theme.
The button shows Saving... while CreateUpon stores the theme, then changes to Saved with a checkmark. CreateUpon also sets the new theme as your workspace default if you do not have one yet.
After you save a theme, or if you decide to skip the step:
1. Select Create my first course to open the course creation flow.
2. To skip the brand theme for now, select Skip for now before creating a course. The button only appears until you save a theme.
CreateUpon opens the course creation flow with a fresh project that already uses the theme you saved.
Custom Themes
Create, edit and manage custom themes for your courses
