
Steps arranges content as a vertical stack. Each step shows a numbered badge on the left and a content area on the right. CreateUpon numbers the steps for you, starting at 1. Numbers update as you add or remove steps, so the sequence stays correct.
Steps works well for:
• how-to procedures or tutorials
• onboarding flows
• recipes, checklists, or decision sequences
• any content where order is important
The layout stays vertical on all screen sizes. Steps does not reflow into columns on larger screens, so the numbered order remains clear.
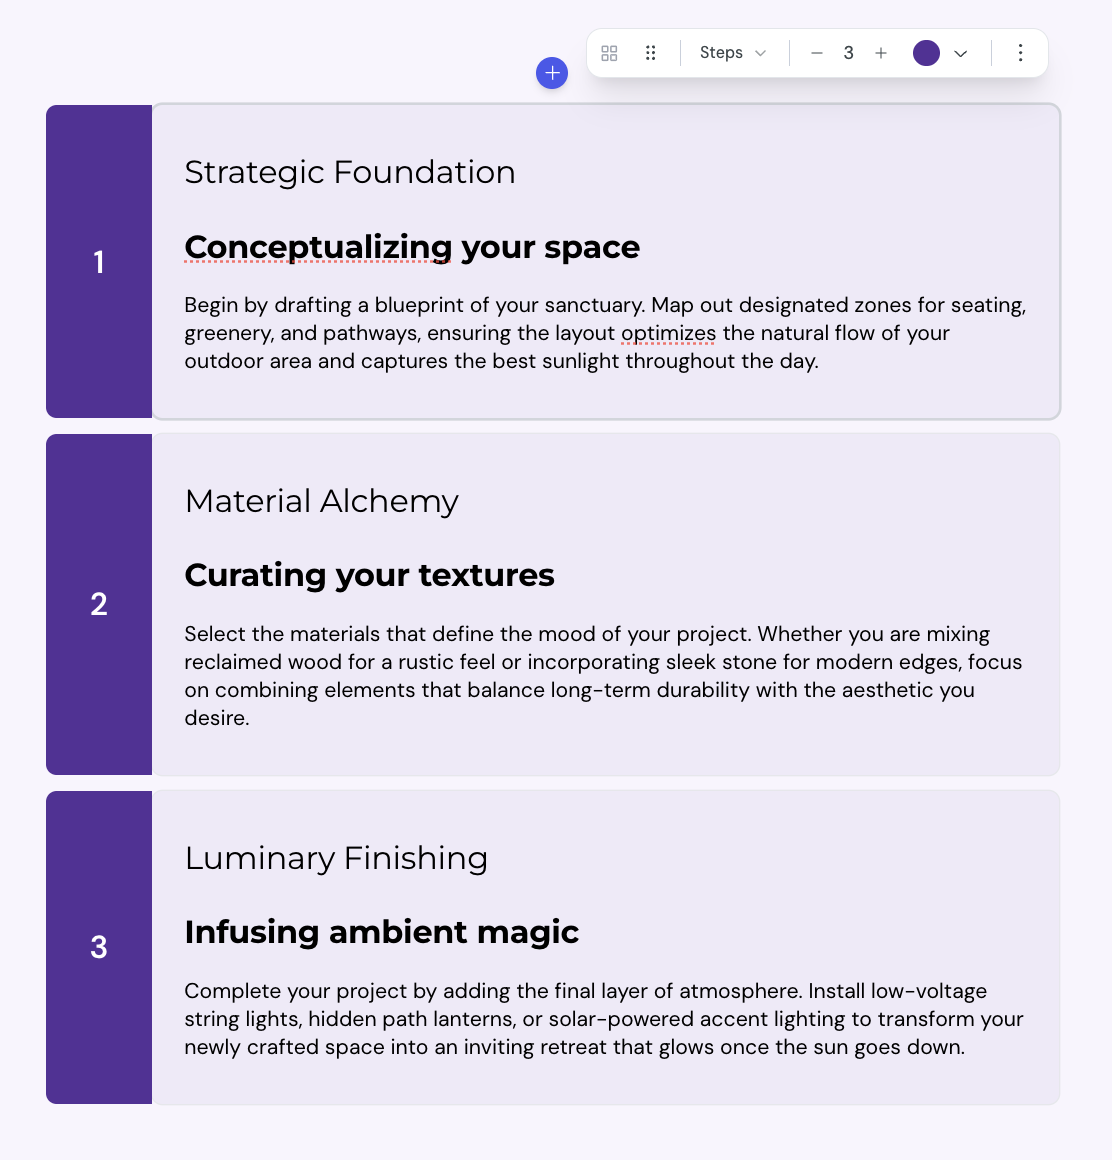
You can add a Steps block anywhere in a lesson.
1. Open the lesson in the lesson editor.
2. Place the cursor on an empty line inside a card.
3. Type / to open the insert menu, then select Steps.
The editor adds a Steps block with 2 steps. Each step starts with a placeholder heading and description.
Each step accepts any kind of block content. You can add:
• headings and paragraphs
• images, videos, and other media
• code blocks
• nested layout blocks
To edit a step, select inside the content area and type or paste your content.
A Steps block supports 2 to 10 steps.
1. Select the Steps block.
2. In the toolbar, find the cell counter.
3. Select + to add a step at the end, or − to remove the last step.
To add a step between two existing steps, select inside a step and then select Add item in the cell toolbar. CreateUpon inserts a new step after the current one and renumbers the sequence.

The toolbar above a selected Steps block offers more controls.
• Layout type: switch between Grid, Steps, Timeline, Alternating, and Cycle
• Color: set a color for all step badges in the block
• Constrain width: limit the block to 800 pixels wide, or switch to Full width to fill the page
You can also override the color of an individual step. Select the step, then pick a color from the cell toolbar.
You can also add an icon to an individual step. Select the step, then pick an icon from the cell toolbar. The icon appears above the step's heading.
Layout & columns
Configure the column layout of your card
Layout block width
The Constrain width option controls how wide a layout block spans on the lesson page. You can set the width for each block, so different layouts in the same lesson can use different widths.
