
Every course has a sidebar on the left. It lists the course structure (modules, lessons, and cards) and lets you jump to any part of the course with a single click.
The sidebar looks and works almost the same in two places: the viewer, where learners take the course, and the editor, where you build it. This article covers both.
When a learner opens a course, the sidebar shows each lesson as a single row with a numbered circle and the lesson title. Select a row to open that lesson.
The numbered circle shows where the learner is and how far they have come:
• An outlined number is a lesson that has not been started.
• A filled green number is the current lesson.
• A checkmark replaces the number once a lesson is complete.
The lesson in view is highlighted in green, so a learner's place in the course is always clear.
If a course is organized into modules, each module appears as a heading in capital letters, with a thin divider between modules. Only the module in view stays open, so the sidebar stays short as a learner moves through a long course.
Within a lesson, its cards appear as a short indented list, each with a small marker that turns green for the card in view. Select a card to scroll straight to it
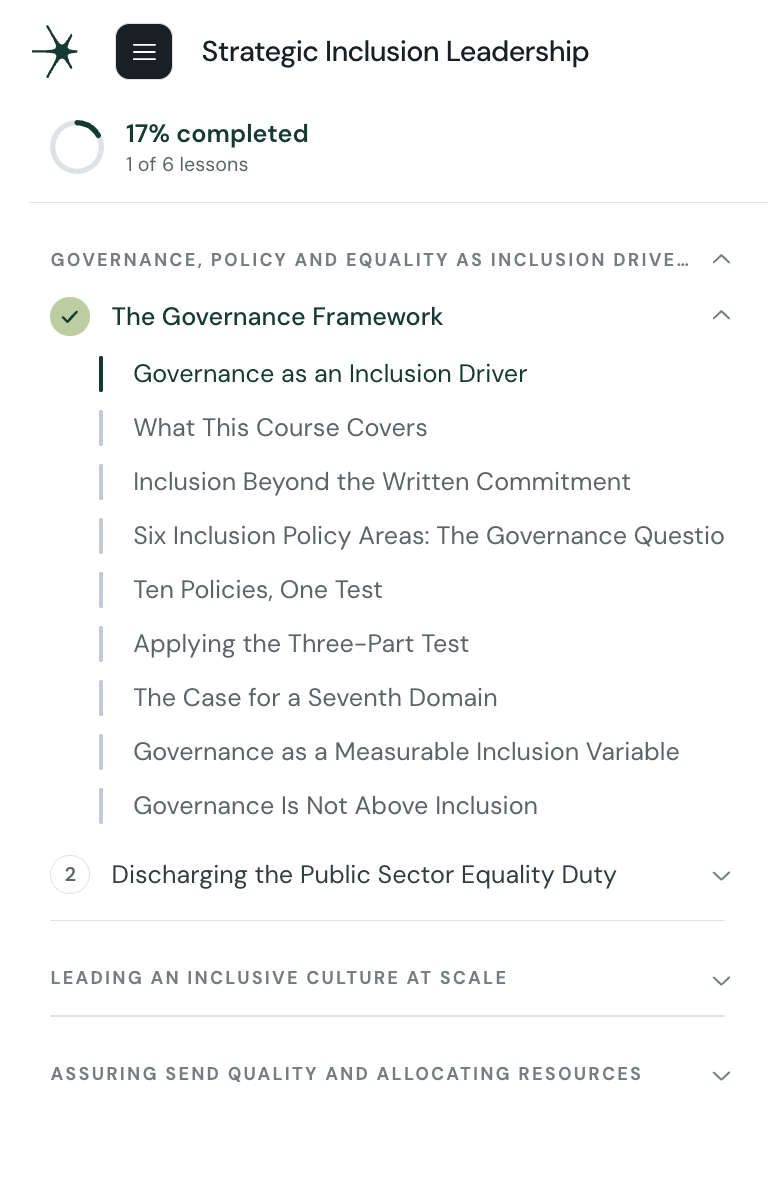
At the top of the sidebar, a green ring and a label show progress through the course. The label reads the percentage complete, for example 40% completed, with the number of lessons finished below it, for example 2 of 5 lessons. The ring fills as the learner goes through lessons and shows a check when the course is complete.
Collapse the sidebar to narrow it to a compact rail. The rail keeps the progress ring at the top and shows each lesson as a numbered circle, with the same colors and checkmarks as the full sidebar. Select any circle to jump to that lesson, or expand the sidebar again to see titles.

While you build a course, the same sidebar appears on the left of the editor and doubles as your outline. It uses the same numbered lessons and card markers as the viewer, so the structure you edit matches what learners see.
Point at any row to reveal its controls:
• A drag handle appears in place of the lesson number, or to the left of a card marker. Drag it to reorder lessons and cards, or to move a card into another lesson.
• A three-dot menu opens the actions for that row.
Select the chevron on a lesson to expand or collapse its cards.
The three-dot menu on a lesson includes Edit title, Hide lesson, and Delete Lesson. Select Edit title to rename the lesson inline.
A hidden lesson stays in the editor but is left out of the published course. Hidden rows appear dimmed with a crossed-out eye in place of the number.
Cards have their own menu for the actions that apply to a single card.
Modules appear as folder rows. Point at a module to drag it into a new position, and use its menu to rename or manage it. Select a module to expand or collapse the lessons inside it.
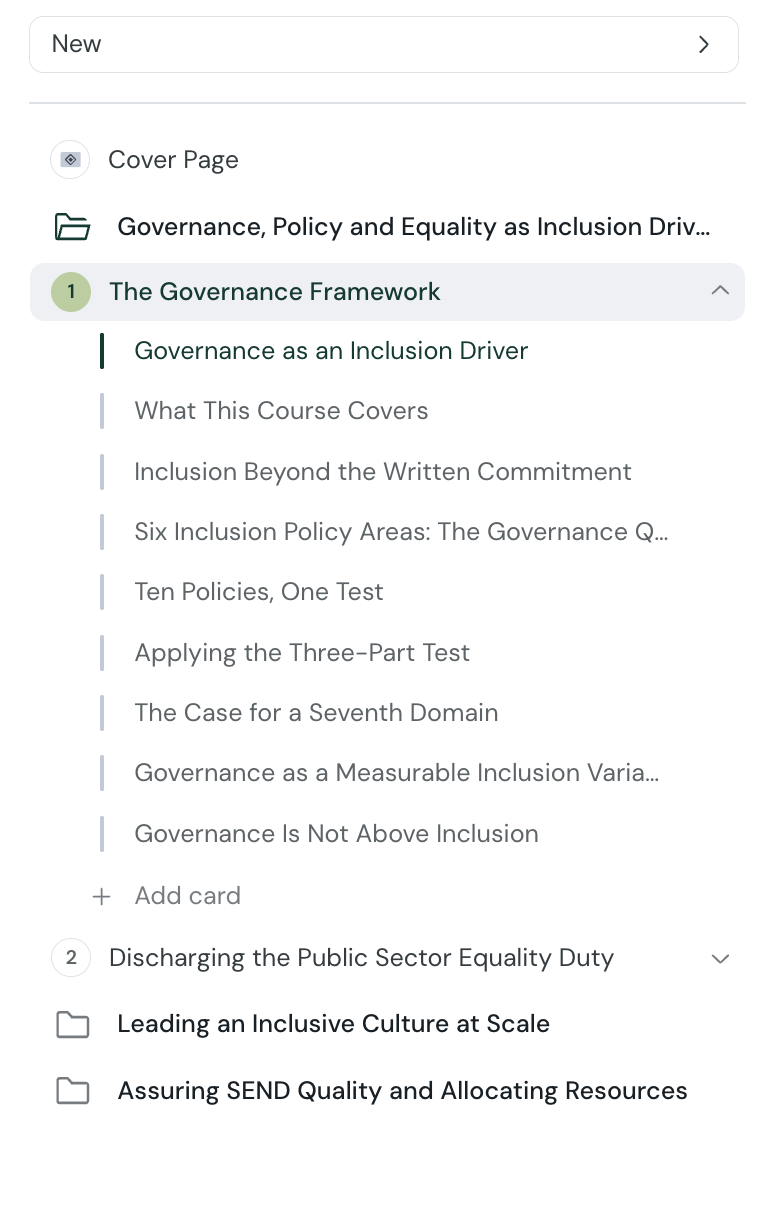
Rearrange lessons and cards
Drag and drop cards, lessons and modules to restructure a course
Add a card, lesson, or exam
Easily add more cards, lessons, or exams to your course
